You’d think that a podcast editor company does not have the most “fun” work you can imagine. Sometimes that’s true, however, it is a vital and rewarding part when a podcast achieves greatness. Therefore, you want your podcast to get to a level that it deserves. All great podcasts have great audio. How do you get the perfect audio edit? In this article we will show you our workflow as professional podcast editors for companies. Before we show the tools that we use in our work, first we need to get a few things straight.
- A professional editor can only make a good podcast better
- A professional editor cannot make up for a bad podcast
- You can improve your podcast by editing your own podcast
- You can deteriorate your podcast by editing your own podcast
We will try to explain our workflow and reasoning so you can implement these tools for yourself or understand our process. In general, there is not one-way to edit podcasts, this is a matter of taste, so please keep in mind that processes can differ.
Never forget that content is always more important than the quality of the recording.
Recording the rough audio file
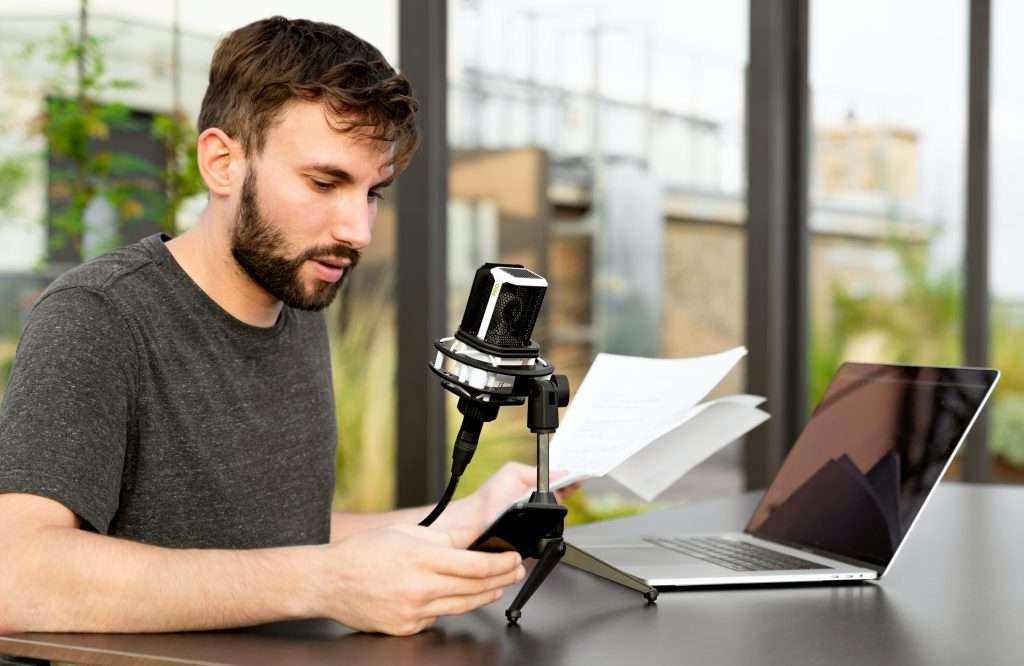
Assuming you have the equipment available, you will always start by recording the conversation. Most of the post-editing can be fixed by placing the microphones correctly. However, in this article we do not go into it much, but in the future, we will pay more attention to this. If you want to get the best results from a microphone, read this article about the proximity effect.
Cutting the audio of the file
Before a podcast editor starts editing for companies, he listens to the podcast in its entirety. This feels superfluous but it will surprise you how important it is to see the big picture in front of you first. Especially when we are asked to help creatively with structuring the podcast. How to effectively structure a large podcast? With a long form podcast, we normally use Sonix.ai ; a speech-to-text editor that we use for our companies. With their timestamps and accurate text documents it’s easier to make a cohesive story before you start cutting the audio files.
The roadmap of a podcast editor
- With a notepad next to the editor, he globally writes down striking things in the recordings. Specific moments that were good and things that were maybe a bit less interesting in the recording.
- He looks at the audio file and removes large silences and loud sudden noises in the recording. For example, people that are drinking/eating around the microphone, people go to the toilet or hitting the table.
- The audio plays and they listen to the rhythm of the person who talks. Some podcast guests are natural speakers, and for some it is a little more difficult (which is totally fine by the way!). When the podcast editor company gets permission, he tries to remove the “superfluous” information, such as many silences, “uhm’s” or repeated sentences.
- In other cases, the editor tries to change the rhythm of the podcast as little as possible. Especially when the podcast guests are natural speakers and who come out of their words well. But we can assure you, our podcast editors have edited hundreds of podcasts for companies and can guarantee you that this is so much more difficult than it seems at first sight.
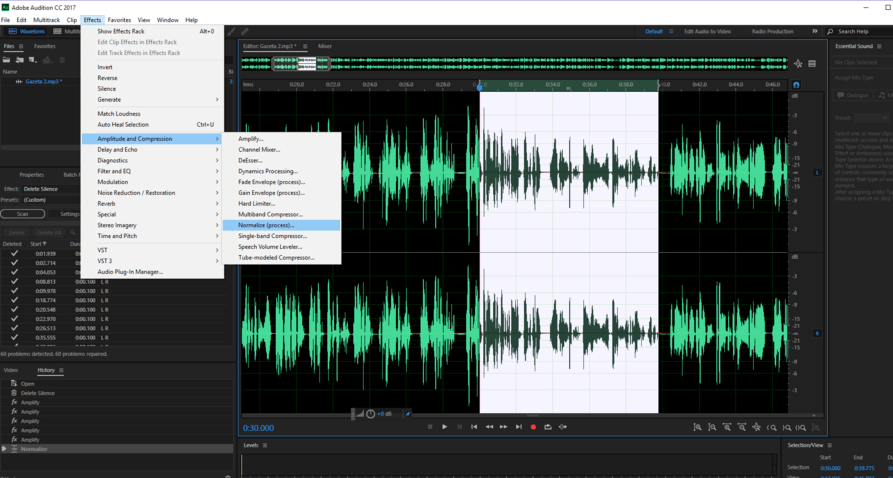
A complete video how a podcast editor company edits in Audacity.
Let the voices come forward and analyze noise
So now we have an edit of our podcast. The structure is set, and right content is in place. Now our editor can optimize the podcast so it’s publish-ready for our companies. Usually this is the part where non-professionals miss the mark. This mixing stage should be very structured, so you don’t worsen the audio quality. Especially audio that doesn’t have the best quality (i.e. blowing wind, crowd noises) should be handled carefully.
To make this stage more visual, compare editing the audio material to cooking. The previous steps were mainly the cutting stage. Doing the groundwork so you have a good base so that all the main ingredients are in place. Think of the mixing stage as the spice rack where you can use spices to “spice” up the audio. When you listen to a great podcast of a company that’s getting you sucked in, it’s probably thanks to a podcast editor that had a great ear for mixing voices and music.
There are a few Virtual Studio Technologies (VST) that we use on a daily basis.
- Compression (Compression)
- Equalizer (EQ)
- Noise reduction (noise reduction)
- Reverb (reverb)
There are many more possibilities, but these are the most important things when editing a podcast. If these terms sound unfamiliar, let’s give them all a brief description and its function.
Equalizer
EQ is being used in almost every recording our podcast editor edits for our companies. EQ stands for Equalizing and is used to cut or boost specific frequencies in the sound. For example, when a podcast recording has a lot of bass, you can cut those frequencies out, so you have less rumbling. Or if you have a recording that sounds muffled, you can turn up the high frequencies to hear more detail in their voices. It can also be used very precisely to remove specific frequencies that are unpleasant for the ear.
Graphically, you can represent the sound as a horizontal line with the lowest frequencies on the far left and the highest frequencies on the far right. The vertical axis determines the strength of the sound in decibel (dB). Equalization allows you to boost this horizontal line by making it drop or raise it at certain points on the spectrum.
Compression
Compression is probably the most difficult VST to explain well to a layman. You find many professionals that find it difficult to explain this to others. Hope we do it justice so that you have a better understanding of compression and edit your own podcast the best way possible.
To put it simply, compression reduces the dynamic range of a specific audio track by lowering the volume level of the loudest parts and moves them closer to the softer segments of the track. By doing this, you have fewer variations in volume, from the microphone to the final product.
After reading still don’t fully understand the principles of compression? Our podcast editor company is always happy to ellaborate and advise you on your podcast journey. Give us a message and we’ll get in contact with you today!
Threshold
The most important knob on a compressor is the threshold. With this knob you are able to set a limit to when the compression should take place or not. So, if the threshold is set to 0 dB, then no compression will take place. However, if you set the limit to 5 dB, all audio above that level will be compressed according to the settings, it kind of limits the louder parts to take place and blends them in with the softer sounds.
Ratio (the ratio)
When we talk about “ratio”, what we mean is how much we want the audio to be compressed above the threshold. The difference between threshod and ratio is that the threshold determines when the compression should take places, where the ratio determines how much compression should take place when the threshold is reached.
An example:
The lowest possible ratio is 1: 1, this means that no compression is applied.
2: 1 means that for every 2 dB the signal comes above the threshold, the compressor is delivering 1 dB output. This makes the noise quieter and more equal to the rest of the track.
When you use a ratio of 4: 1 you can determine the result in a similar way. For every 4 dB that the signal comes above the threshold, the compressor gives 1 dB output. The podcast editor company uses this for the podcasts of our companies to get a great and even sounding episode.
Attack / Release
The attack on a compressor is used to determine how quickly the compressor responds when the signal exceeds the threshold. While release, on the other hand, determines how quickly the original volume is back to normal when the signal returns below the threshold level after it was activated.
Noise Reduction
Noise reduction is self-explanatory. It reduces constant background noises, such as hum and buzzing, hissing etc. Our podcast editor company use Adobe Audition for our companies as their noise reduction tool is the best on the market, but you have lots of free options. Audacity has a great noise reduction tool which could dramatically improve your podcast.
To use noise reduction properly, you need to select a region in the sound wave (i.e. the audio file) that only contains the noise that you want to reduce. This means even someone breathing in the background. These noise reduction tools are amazing, but they could be very delicate to handle if not used properly.
Keep in mind that it can be impossible to get a satisfactory removal if the background noise is very loud or blends with the speaking voices. If the background noise is too loud, it can result in muffled conversations which sound heavily edited and unnatural.
This process relies on computer calculation so if you want to know more about it, you can find the entire process here.
Reverb
The reason why reverb is the last one on the list is because this will not be relevant to everyone. There is a difference in having reverb in your recording and applying reverb in post-production. With poorly insulated spaces, it is absolutely not intended that you apply this with a podcast. Our podcast editor company uses reverb to enforce storytelling for our clients. Especially in storytelling, we can use audio effects such as reverb to play an important role to make a story more compelling.
The description of Reverb
Sound, like voices or coming from a speaker that are produced in a room, will bounce thousands of times against the ceiling, the floor, the walls and other materials until the sound goes extinct.
These sound reflections are the strongest when bounced of hard materials, such as concrete, stone, glass and wood. For instance, every time the sound touches a side wall and is reflected, part of it is not reflected but is absorbed by the wall or the material of which it is built.
With every bounce of an object or wall noise is constantly bounce back and forth. This continues until the sound is extinct. In a small room the sound will reach the walls and the ceiling much faster and can be reflected back. For example in a large room a church, because in a small room the walls are closer. When you are in a smaller room, the noise bounces quicker against the walls and ceiling, thus the sound goes extinct quicker. By using thicker materials like rockwool or carpets you can reduces the reverb in the room because they absorb the sound waves much quicker than flack hard surfaces such as glass and concrete.
Our invitation to you and final word
When you say podcast service, you say Vita Voca. We can help from A to Z, from purchase and advice on material up to publication. Not only do we offer a helping hand in the technical support, but we are also happy to help with the creative part if needed.
We are (as far as we could find) the only podcast editor company that have international graduated musicians. For example, our podcast editors make original podcast jingles and music for our companies and other customers. This music is used exclusively for the podcast. If the company has a new concept that they want to try out, we can just as easily make new podcast jingles so that it perfectly matches the project.
Feel free to send us a message for more information.